Essentials of Piano Finger Placement
Achieving the correct finger placement is a cornerstone of piano learning, crucial even for beginners playing simple melodies or practicing scales. Begin by positioning yourself in the center of the keyboard with upright posture, gently curving your fingers above the keys, placing your right thumb on middle C. Early adoption of proper hand and finger techniques eases the transition to more intricate musical pieces.
Optimal Hand Positioning

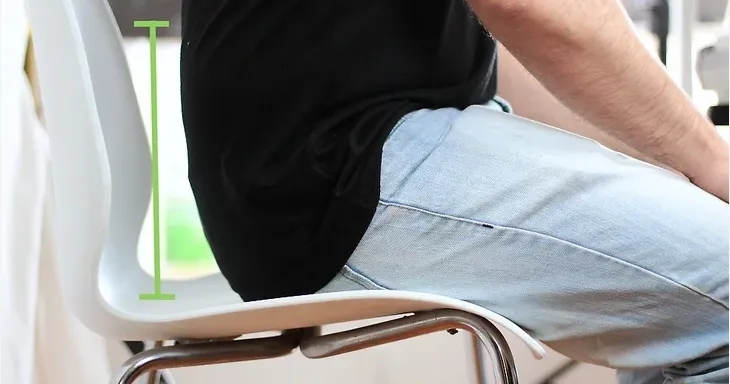
- Position yourself at the piano bench’s edge, ensuring you’re seated towards the front with feet firmly on the ground, knees bent at a 90-degree angle, allowing for pedal access later. Avoid having your thighs on the bench .

- Ensure your head and shoulders are aligned for optimal reach across the keyboard and to prevent back issues. Shoulders should be rolled back, neck relaxed, and gaze forward, avoiding bending over the keys

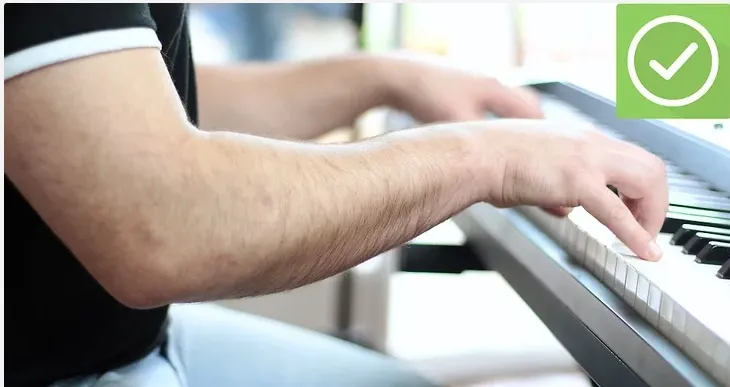
- Your elbows should be slightly bent in front of you, with the inner elbow creases facing upwards. Adjust the bench as needed to maintain this position without spreading your elbows too wide, which could lead to wrist discomfort.

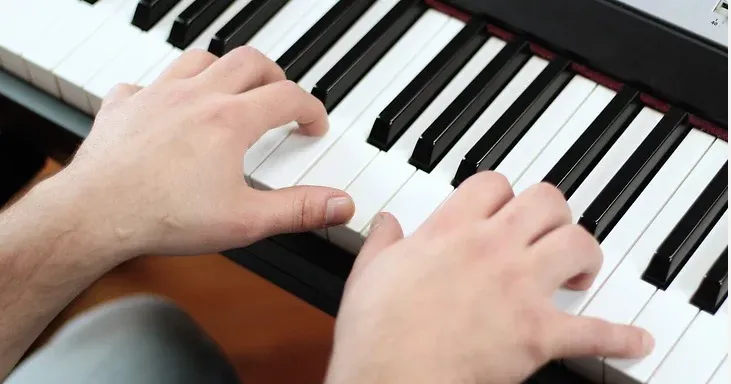
- Your fingers should arch naturally over the keys, similar to holding a ball, with your thumb straight and the other fingers curving gently over the keys. Practicing with a tennis ball can help mimic this curvature.
- Keep your arms and shoulders relaxed to avoid tension, performing simple stretches before playing to loosen up muscles. Regular posture checks during practice will help maintain a relaxed stance.
- Allow your arms to follow your hands’ movement along the keyboard, keeping them aligned to minimize wrist strain. Utilize larger arm and back muscles for pressing keys rather than relying solely on finger strength.
- Maintain short fingernails to avoid interference with playing and prevent clicking sounds on the keys during performance.
Effective Fingering Techniques

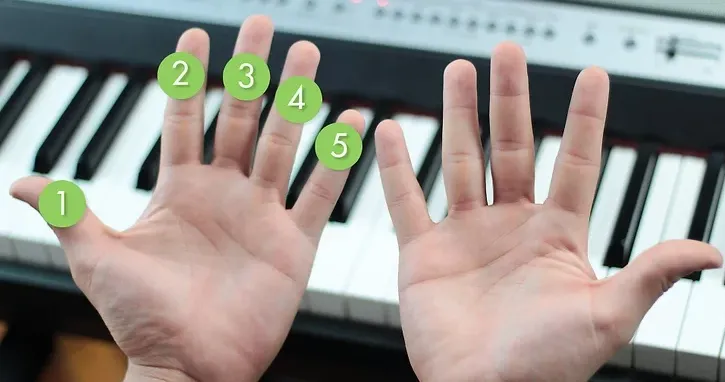
- Assign numbers to your fingers, a universal method used in sheet music, with the thumb as 1 and the pinky as 5, mirrored in both hands.
- Begin with your right thumb on middle C, arranging other fingers naturally on adjacent white keys. For two-handed play, adjust the left hand slightly off middle C to avoid overlap.
- To extend beyond five keys, practice moving your thumb under your fingers for upward scales and the ring finger over for downward scales, establishing fluid hand transitions.
- Use shorter fingers for longer white keys and longer fingers for the shorter black keys, adjusting finger flatness for easier reach to sharps and flats without frequent hand repositioning.
- Strive for symmetry between hands, even when they perform different patterns or movements, to enhance coordination and musical flow.
Scale Practice Tips
- Master scales with correct fingering to build automatic finger movement for scale segments within music pieces, remembering that finger assignments are flexible based on musical context.
- Generally, use your pinky for starting or ending scales, with thumb transitions for seamless octave shifts.
- Explore comfortable fingering for arpeggios, maintaining consistency for even sound. Adapt standard fingerings to fit your hand size and shape, ensuring muscle memory development and minimizing errors.
- Documenting finger numbers on your sheet music can accelerate learning, especially for complex pieces, though this may become unnecessary with experience and skill advancement.
Following these guidelines not only sets a strong foundation for piano proficiency but also ensures a smoother progression towards tackling more demanding compositions.