Guide to Disassembling an Upright Piano
Disassembling an upright piano can be a practical solution if you’re looking to dispose of it, as transporting a whole piano can be cumbersome. However, dismantling a piano is a one-way process that often damages its components, rendering it unusable. If you’re prepared for this, begin by dismantling the external parts to access the piano’s internals, followed by removing the keyboard and action brackets, and concluding with the structural disassembly.
Dismantling External Components 
- Access the Keyboard and Lid: Start by opening the key cover and piano’s top lid. If the lid is fastened, locate and remove any screws to open it.
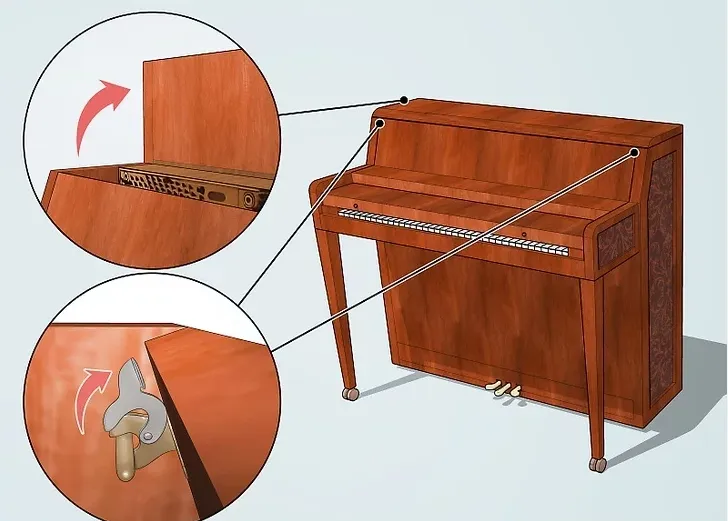
- Remove the Music Stand: Detach the music stand by unhooking or unscrewing it from the piano’s body. This part can be bulky, so assistance might be needed.
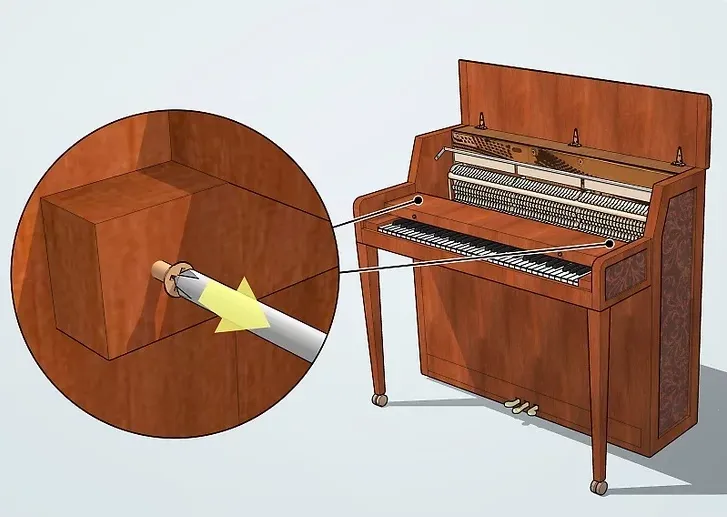
- Detach the Key Cover: Locate screws securing the key cover and remove them to lift off the cover.
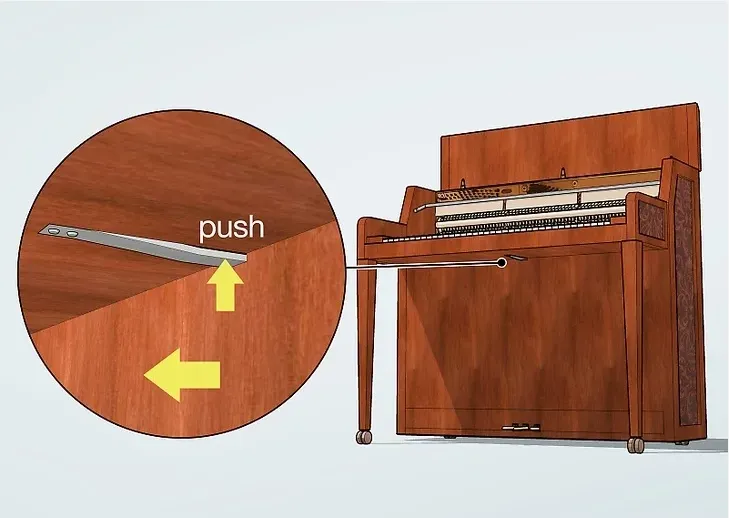
- Expose Inner Workings: Remove the lower panel beneath the keyboard to reveal the piano’s internal mechanism, typically secured by a spring-loaded pin.
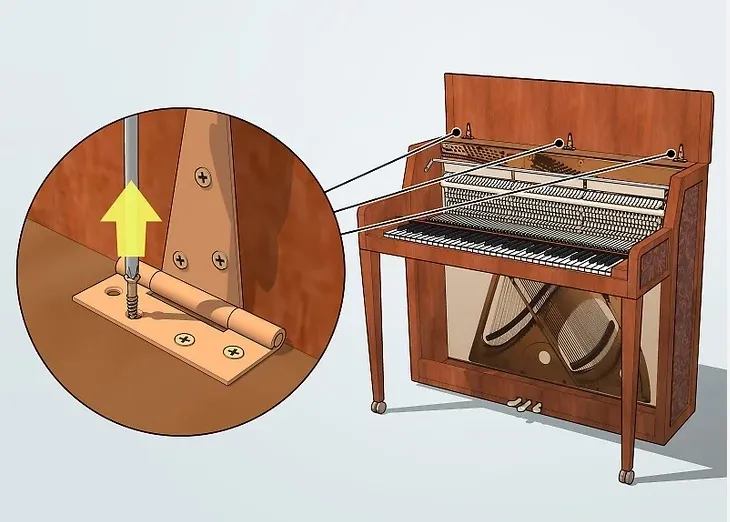
- Take Off the Top Lid: Unscrew the hinges attaching the top lid to the main body and set the lid aside.
Removing the Keyboard and Action 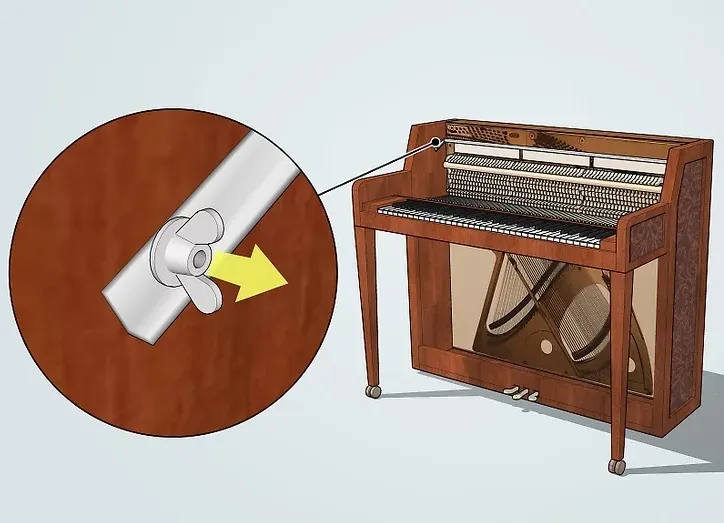
- Extract the Muffler Felt: Locate and unscrew the wingnut or disengage the spring holding the muffler felt to lift it away.
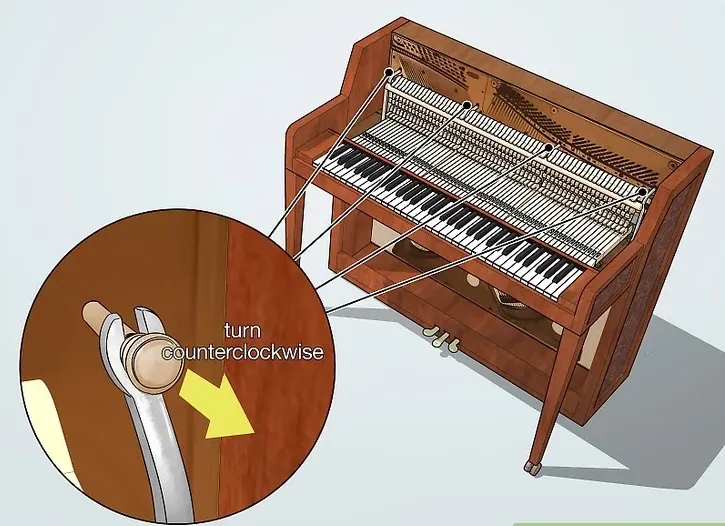
- Detach Action Brackets: Unscrew the bolts from the four action brackets located above the keyboard, freeing the action mechanism.
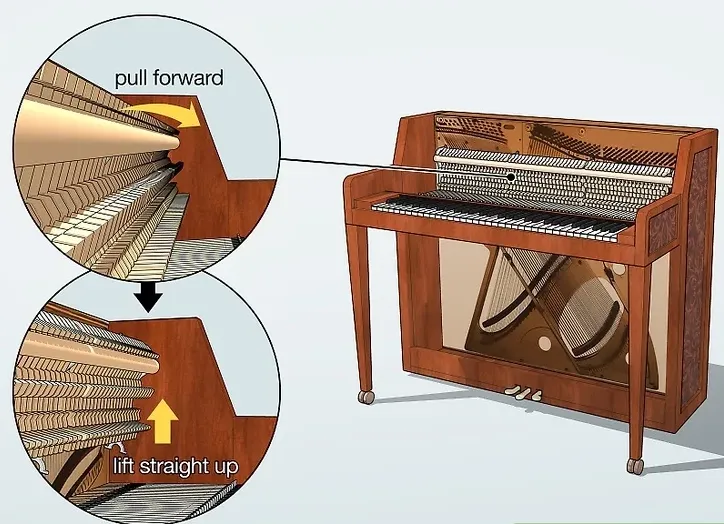
- Remove the Action Mechanism: Gently pull the action mechanism forward, then lift it out. Assistance may be useful due to its weight.
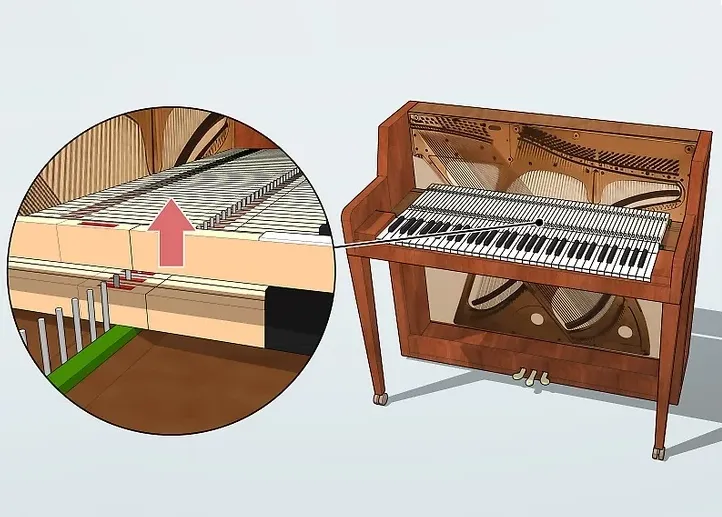
- Lift Out Each Key: Keys can be removed by lifting them straight up as they rest loosely on pins.
Disassembling the Piano Structure 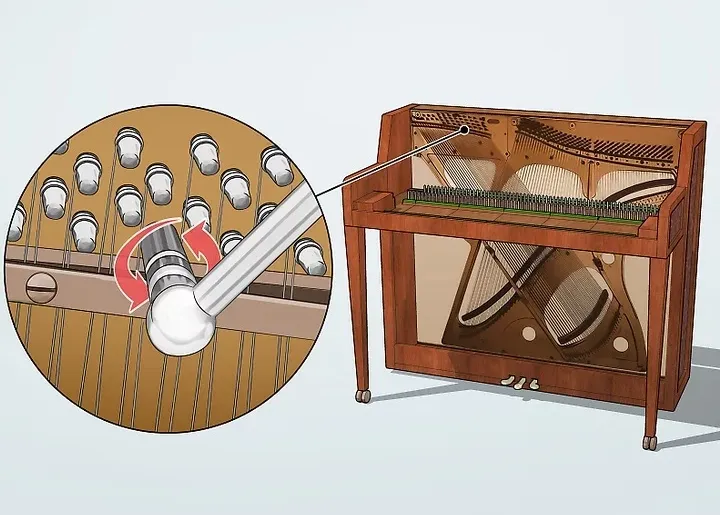
- Release String Tension: Before proceeding, loosen the tension of all strings on the harp by turning the tuning pegs counterclockwise to prevent injury from snapping strings.
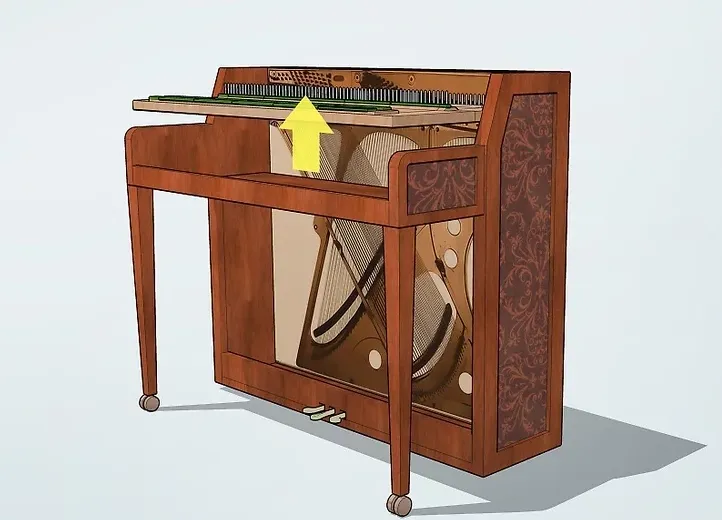
- Dismantle the Key Bed: Unfasten the key bed from the piano frame by removing screws found along its bottom and back legs, then lift it away.
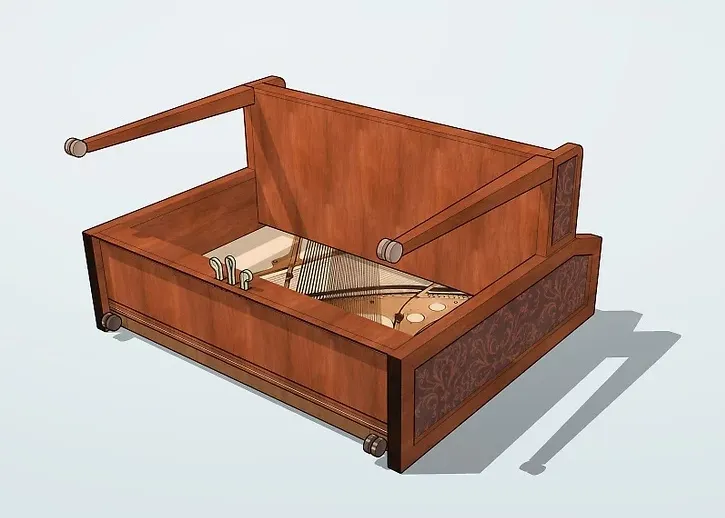
- Lay the Piano Down: To prevent tipping, lay the piano carefully onto its back, ensuring not to trap your fingers or hands during the process.
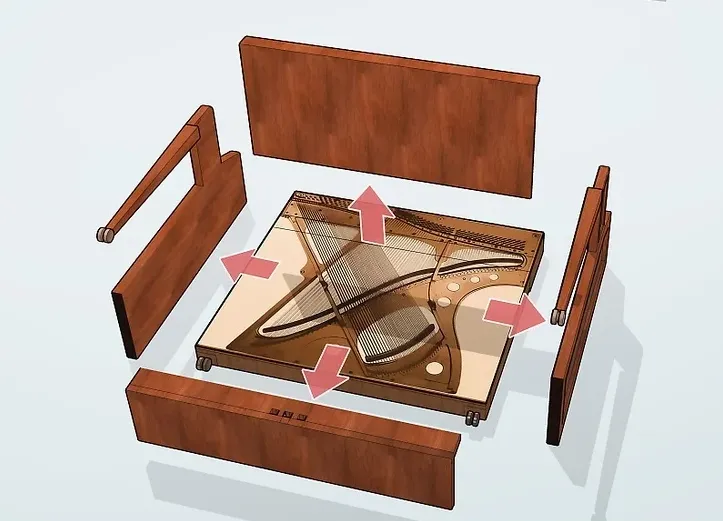
- Remove Side Supports: Unfasten and remove the wooden side supports, which may also house the piano’s wheels, by unscrewing from the inside.
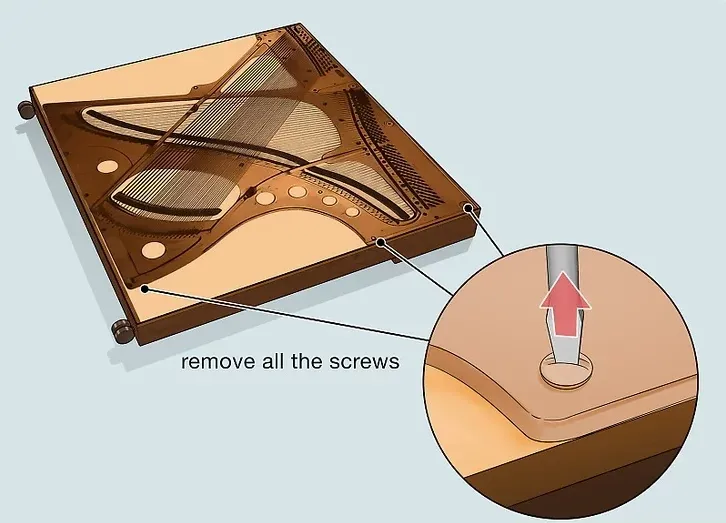
- Extract the Piano Harp: Finally, detach the piano harp by removing all securing bolts and screws, and then lift it off to finalize the disassembly.
Safety and Preparation
- Before starting, clear a workspace and have the necessary tools at hand, including screwdrivers, a hammer, and possibly a helper for the heavier parts.
- Keep all removed screws and components organized in case you wish to salvage or sell parts.
- Wear protective gloves to safeguard against sharp edges and string tension.
Disassembling a piano is a significant task that requires patience and caution. Whether you’re clearing space or salvaging parts, following these steps will help you safely and efficiently dismantle an upright piano.